Creating an Identity Graph
The identity graph wizard walks you through five steps: Name & Source, Select Models, Map Identifiers, Configure Rules and Review. Nothing is saved until you finish — every step is local, so you can move back and forth freely and only the final click creates the graph.
To start, navigate to ID Graphs in the left sidebar and click Create Identity Graph.
Prerequisites
Before starting, ensure you have:
- At least one warehouse connected
- At least one model built on that warehouse, with a primary key column set — a model without one cannot be added to a graph
- An understanding of which identifiers are shared across your models (email, phone, customer id, cookie, …)
Step 1: Name & Source
| Field | Notes |
|---|---|
| Name | Must be unique in the workspace. The wizard warns inline if the name is taken and will not let you continue |
| Description | Optional |
| Source | The warehouse connection the resolution runs in. Only models from this source can be selected in step 2 |
| Output Schema | The warehouse schema the output tables are written to. Defaults to cdp_identity |
| Graph Type | Deterministic or Probabilistic. Fixed at creation |
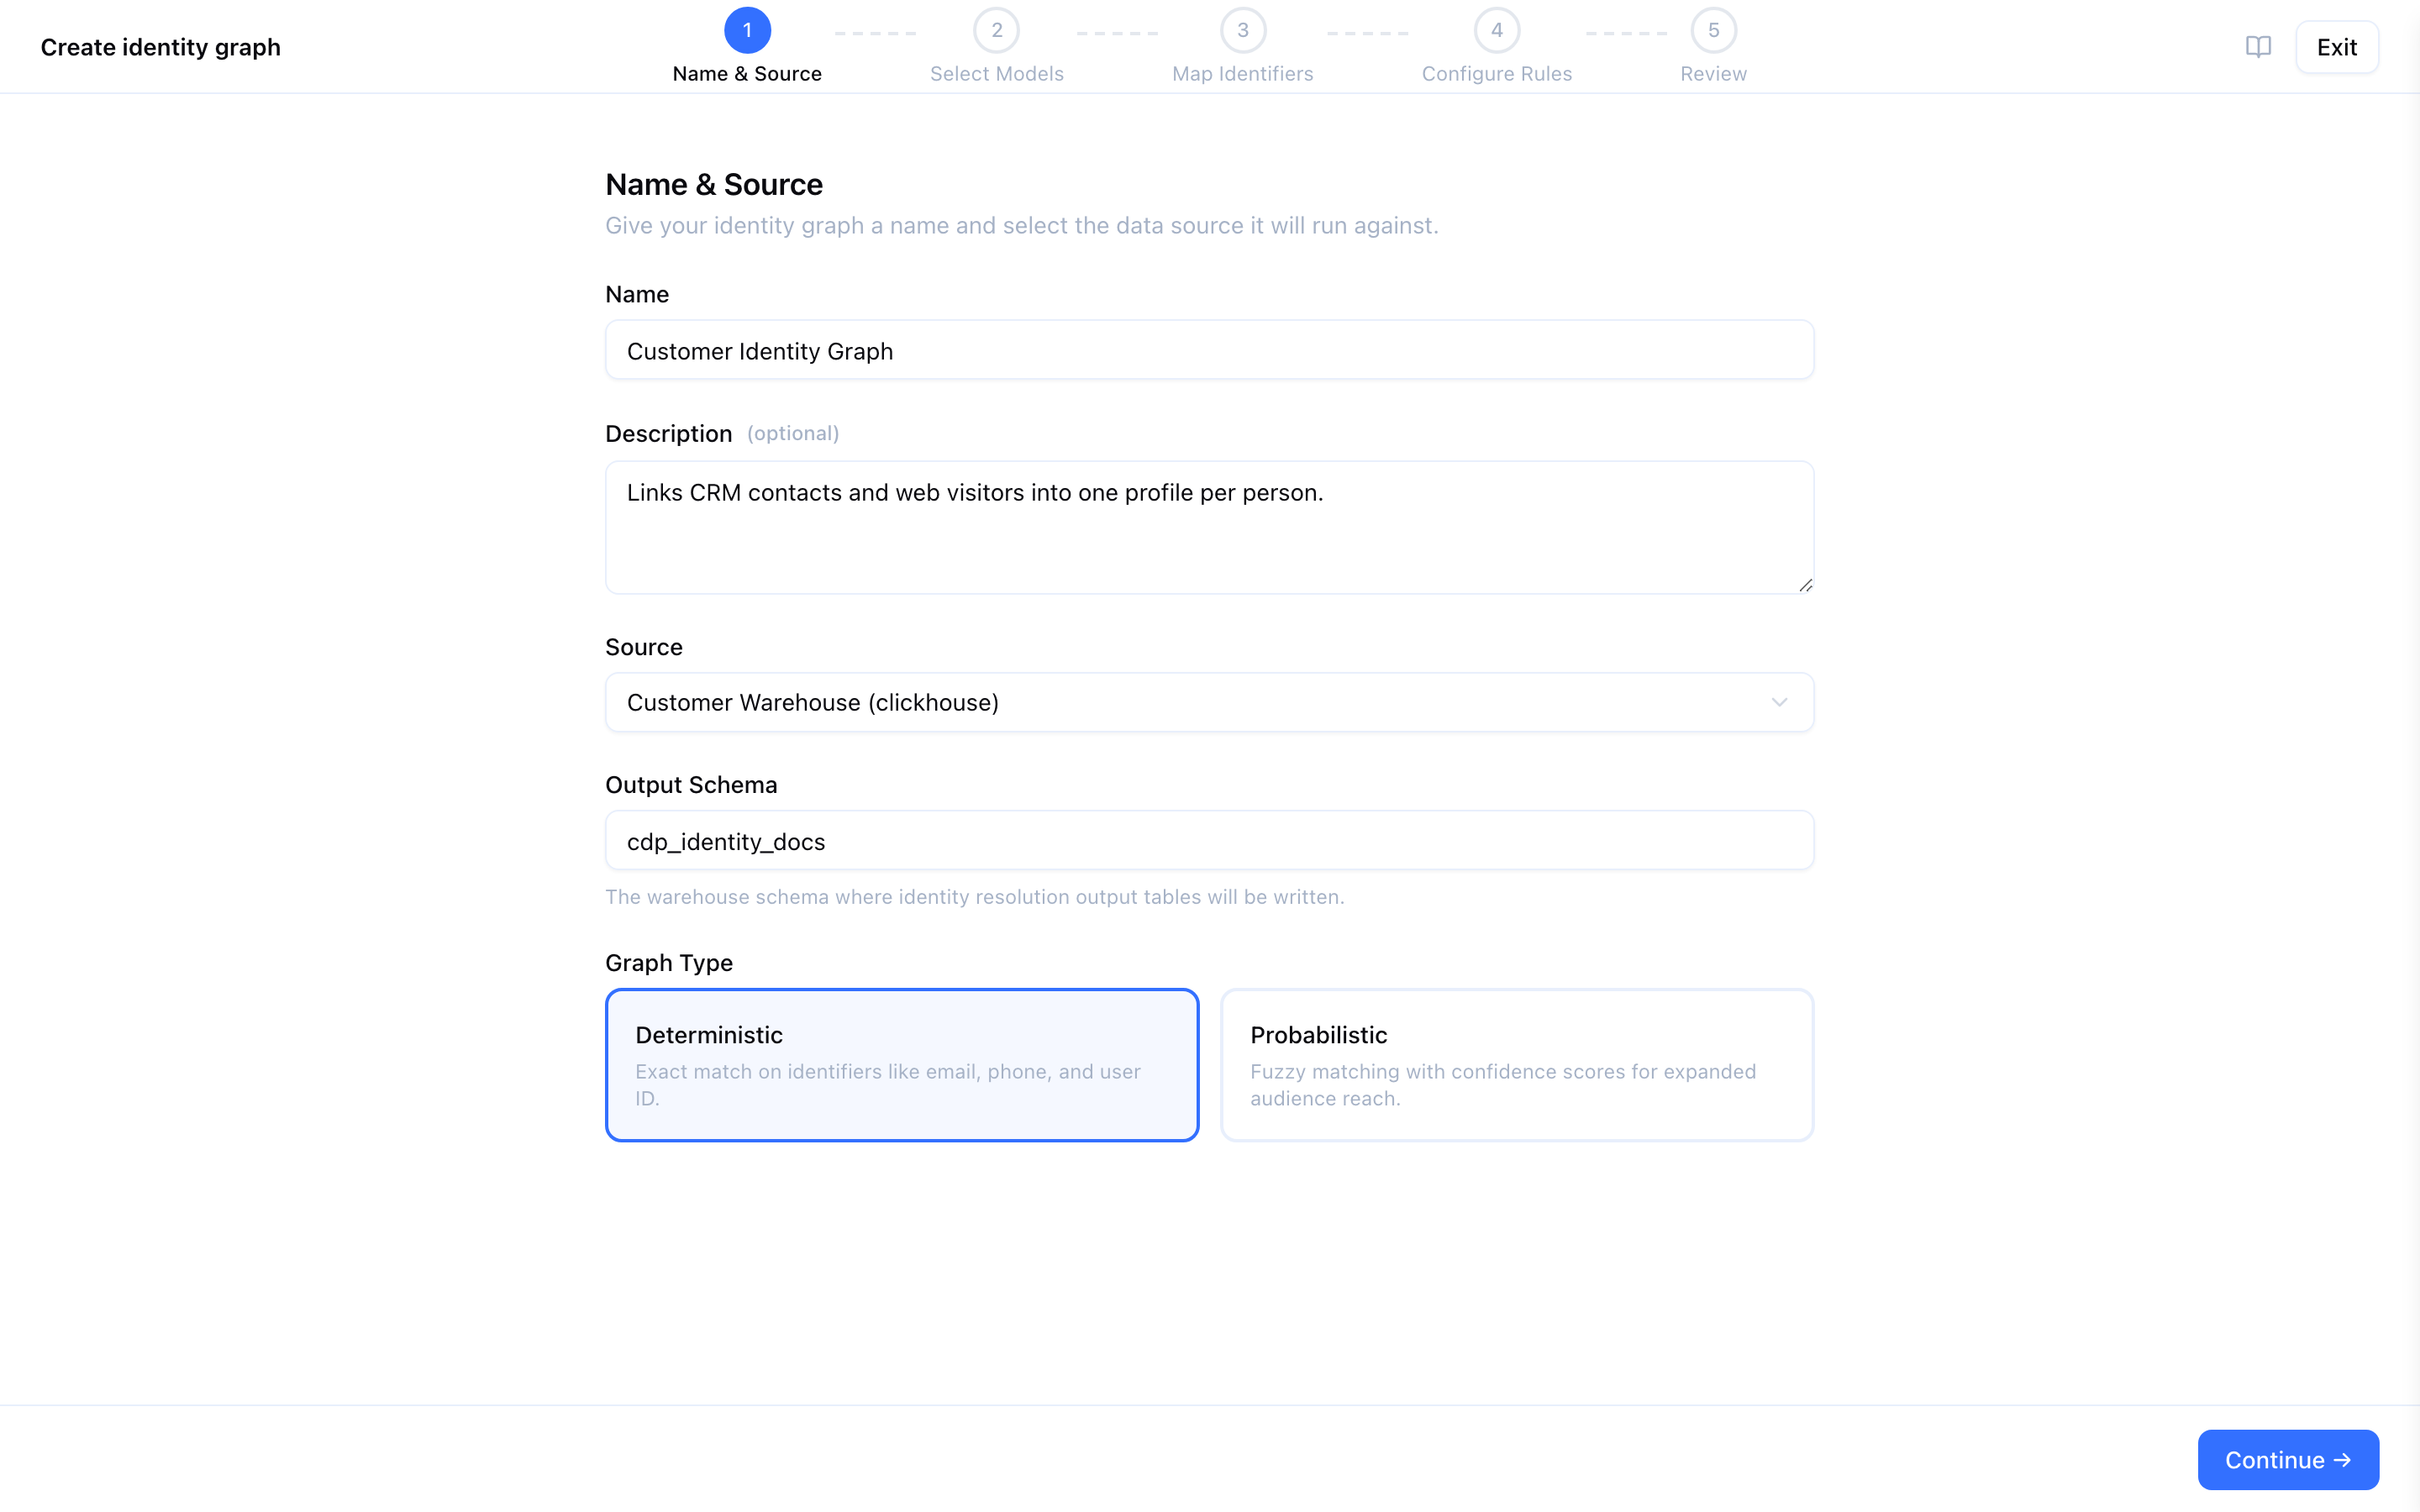
Give each graph its own output schema. A full run truncates the shared output tables, so two graphs writing to one schema means the last to run overwrites the other’s results. The wizard warns when the schema is already in use, but does not block it.
Graph type
Graph type is set here and cannot be changed afterwards. To move from deterministic to probabilistic you create a new graph and run it.
| Type | When to use |
|---|---|
| Deterministic (default) | Exact matching on identifiers like email, phone and user id. No confidence scores anywhere |
| Probabilistic | Adds fuzzy matching — name similarity, IP clustering, household — alongside exact rules, and enables confidence scores and thresholds |
A probabilistic graph still resolves its deterministic rules exactly. You choose which families are scored, rule by rule, in step 4.
Selecting Probabilistic reveals one more control, Default Confidence Threshold (a slider from 0.00 to 1.00, default 0.50). It is the threshold audiences and syncs fall back to when they set none of their own; at 0.00 every scored match is accepted however weak. See Probabilistic Matching.
Step 2: Select Models
Tick the models that hold identity data. The list shows every model on the source you chose, with its column count.
A model whose primary key column is not set is shown greyed out and cannot be ticked — the primary key is what identifies a row inside the graph. Set it on the model first, then come back.
Select models that describe the same real-world people across systems: website users, app users, CRM contacts, support contacts. Resolution links records within one model as well as across several, so a single table with duplicate rows is a valid graph.
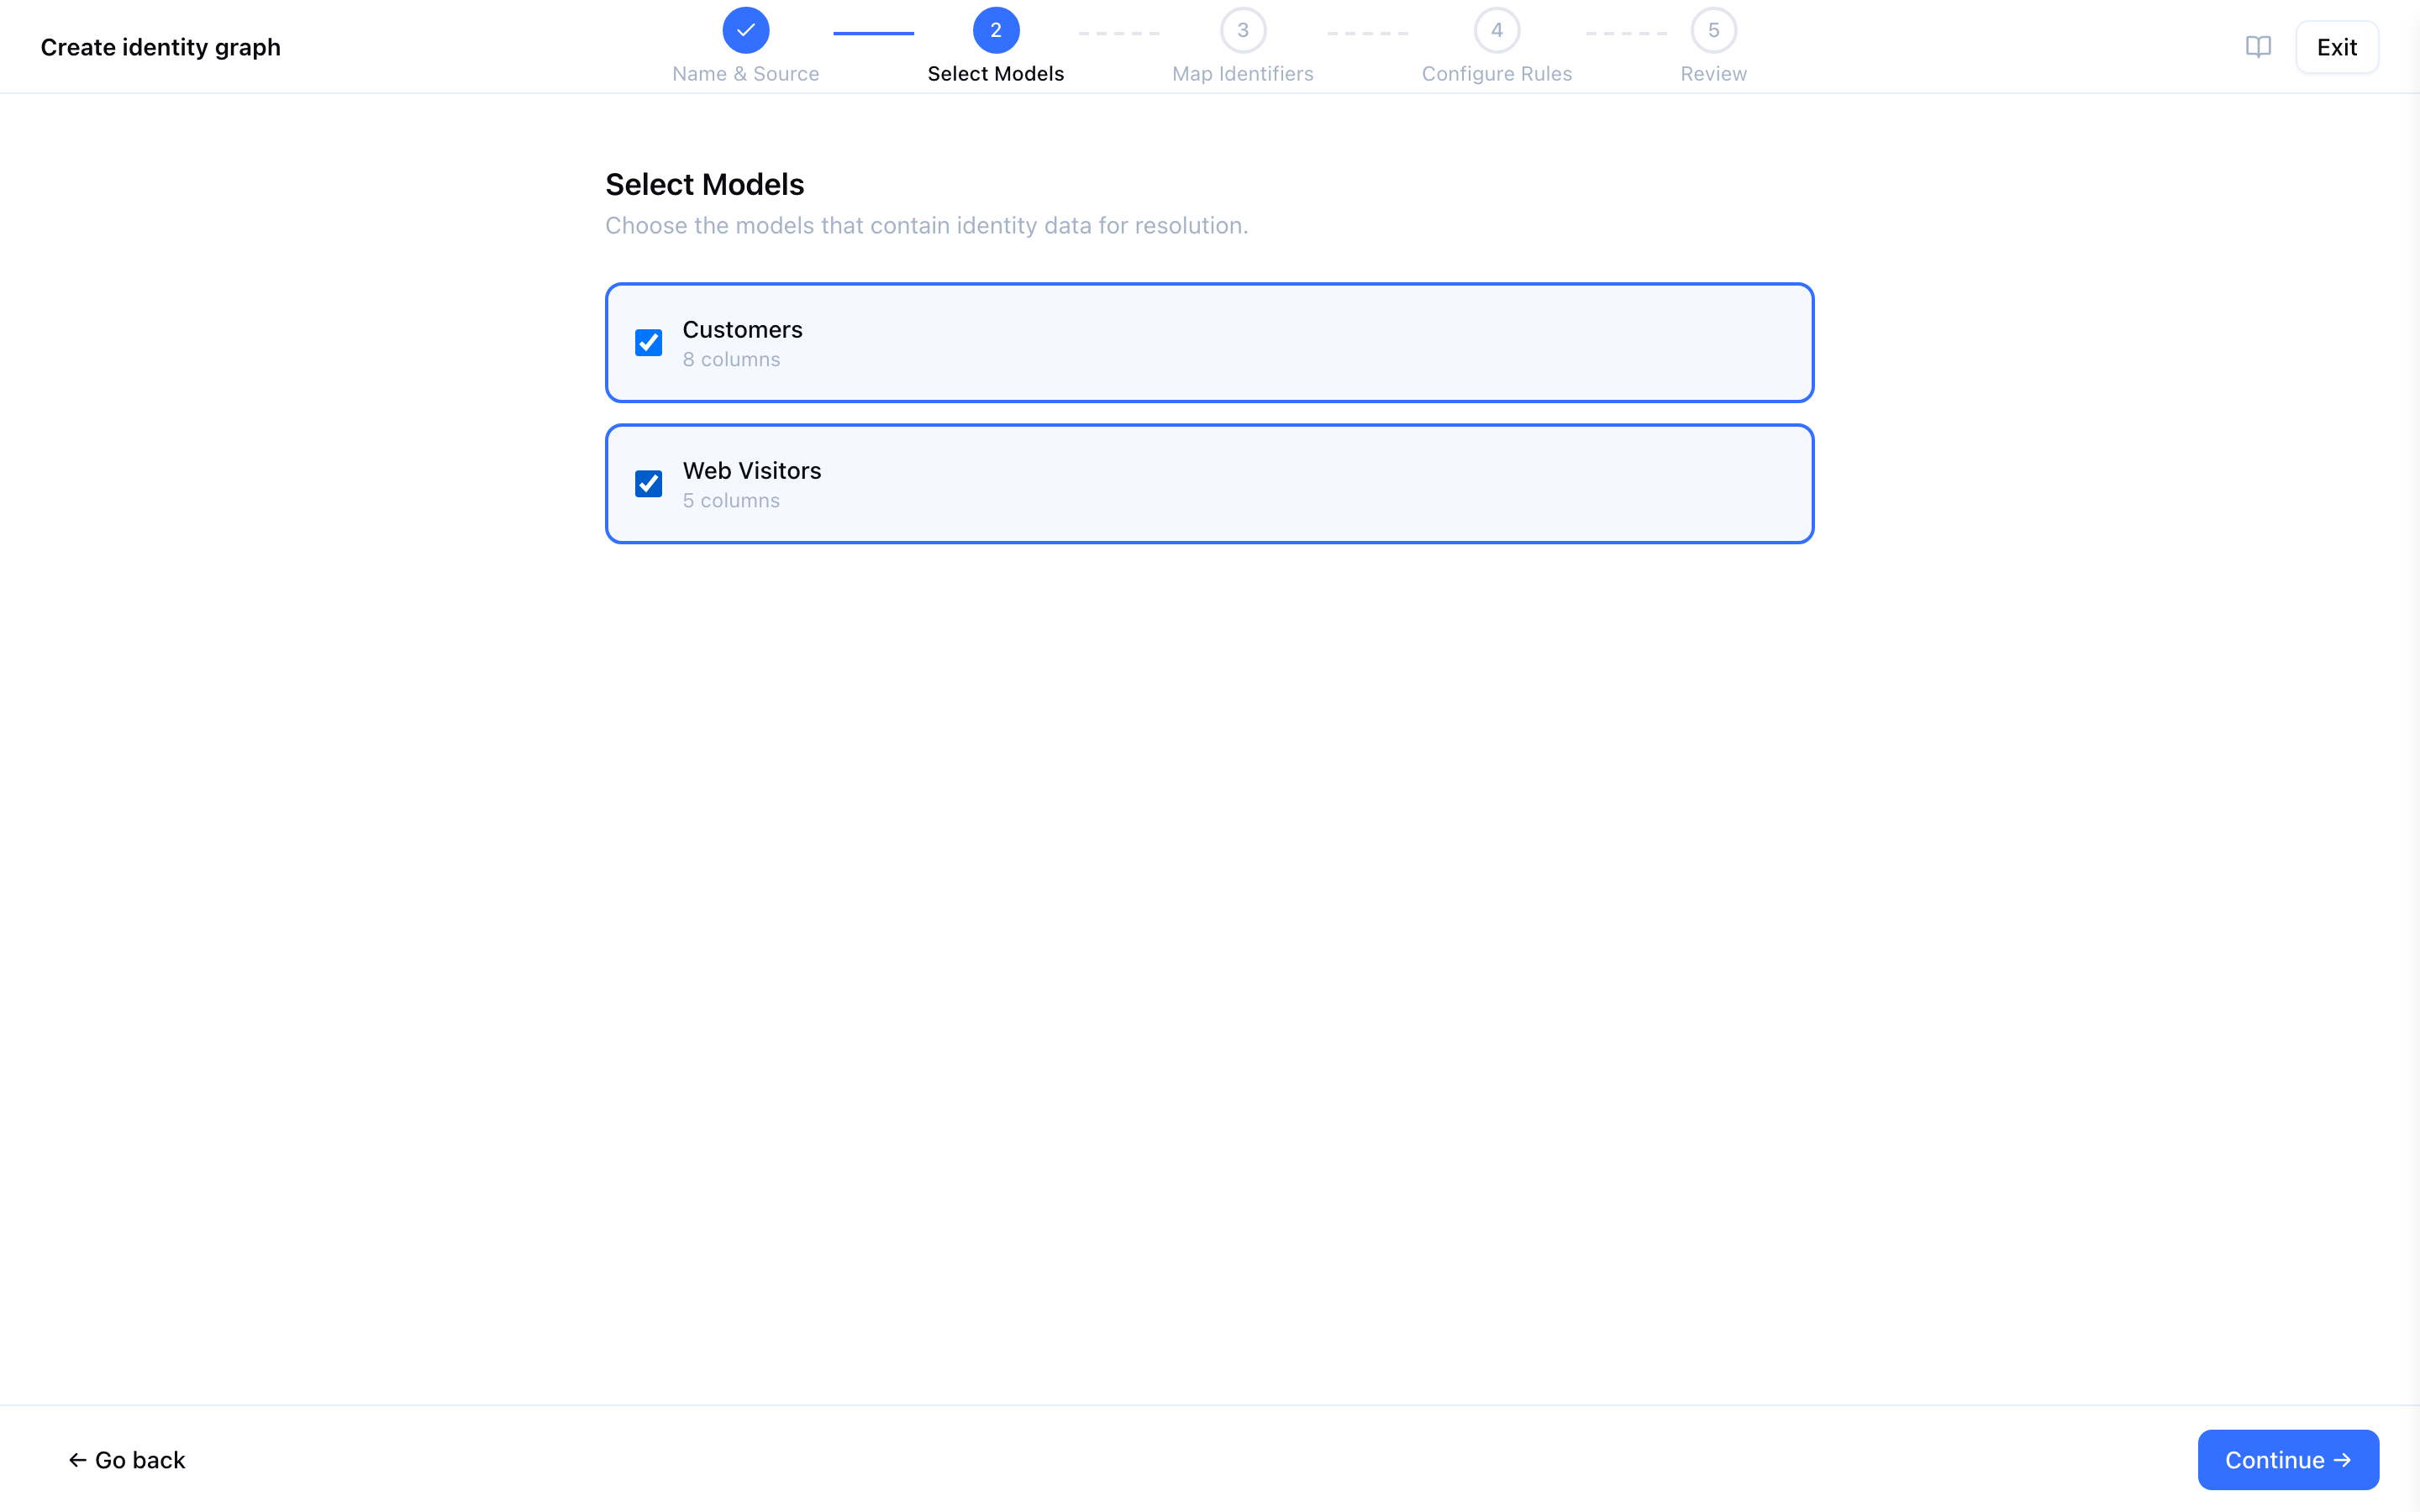
Every model the wizard attaches is attached as a user model — one row per person. If a model is an event stream (one row per occurrence), change its type to event on the graph’s Configuration tab after creation. An event model is collapsed to one node per distinct identifier combination before resolution, so a visitor with 5,000 page views contributes the handful of identifier combinations actually observed rather than 5,000 records.
Step 3: Map Identifiers
For each selected model, click + Add Identifier and pick a column and an identifier type. The identifier-type picker groups the fixed variants under their family, with Custom… at the bottom for anything else.
| Family | Identifier types | What matches |
|---|---|---|
| Email (plaintext), Email (SHA-256 hashed) | The same address, whichever encoding each model stores | |
| Phone | Phone number, Phone (E.164), Phone (digits only) | The same digits |
| User ID | User ID | The same id, case-insensitively |
| Anonymous ID | Anonymous ID | The same id |
| Name, IP Address, Address | First/Last/Full name, IP address, Postal/ZIP code | Nothing on their own — these feed probabilistic scoring functions |
| Custom | Custom…, then a name you type | The same value, trimmed and lowercased. Each name is its own family |
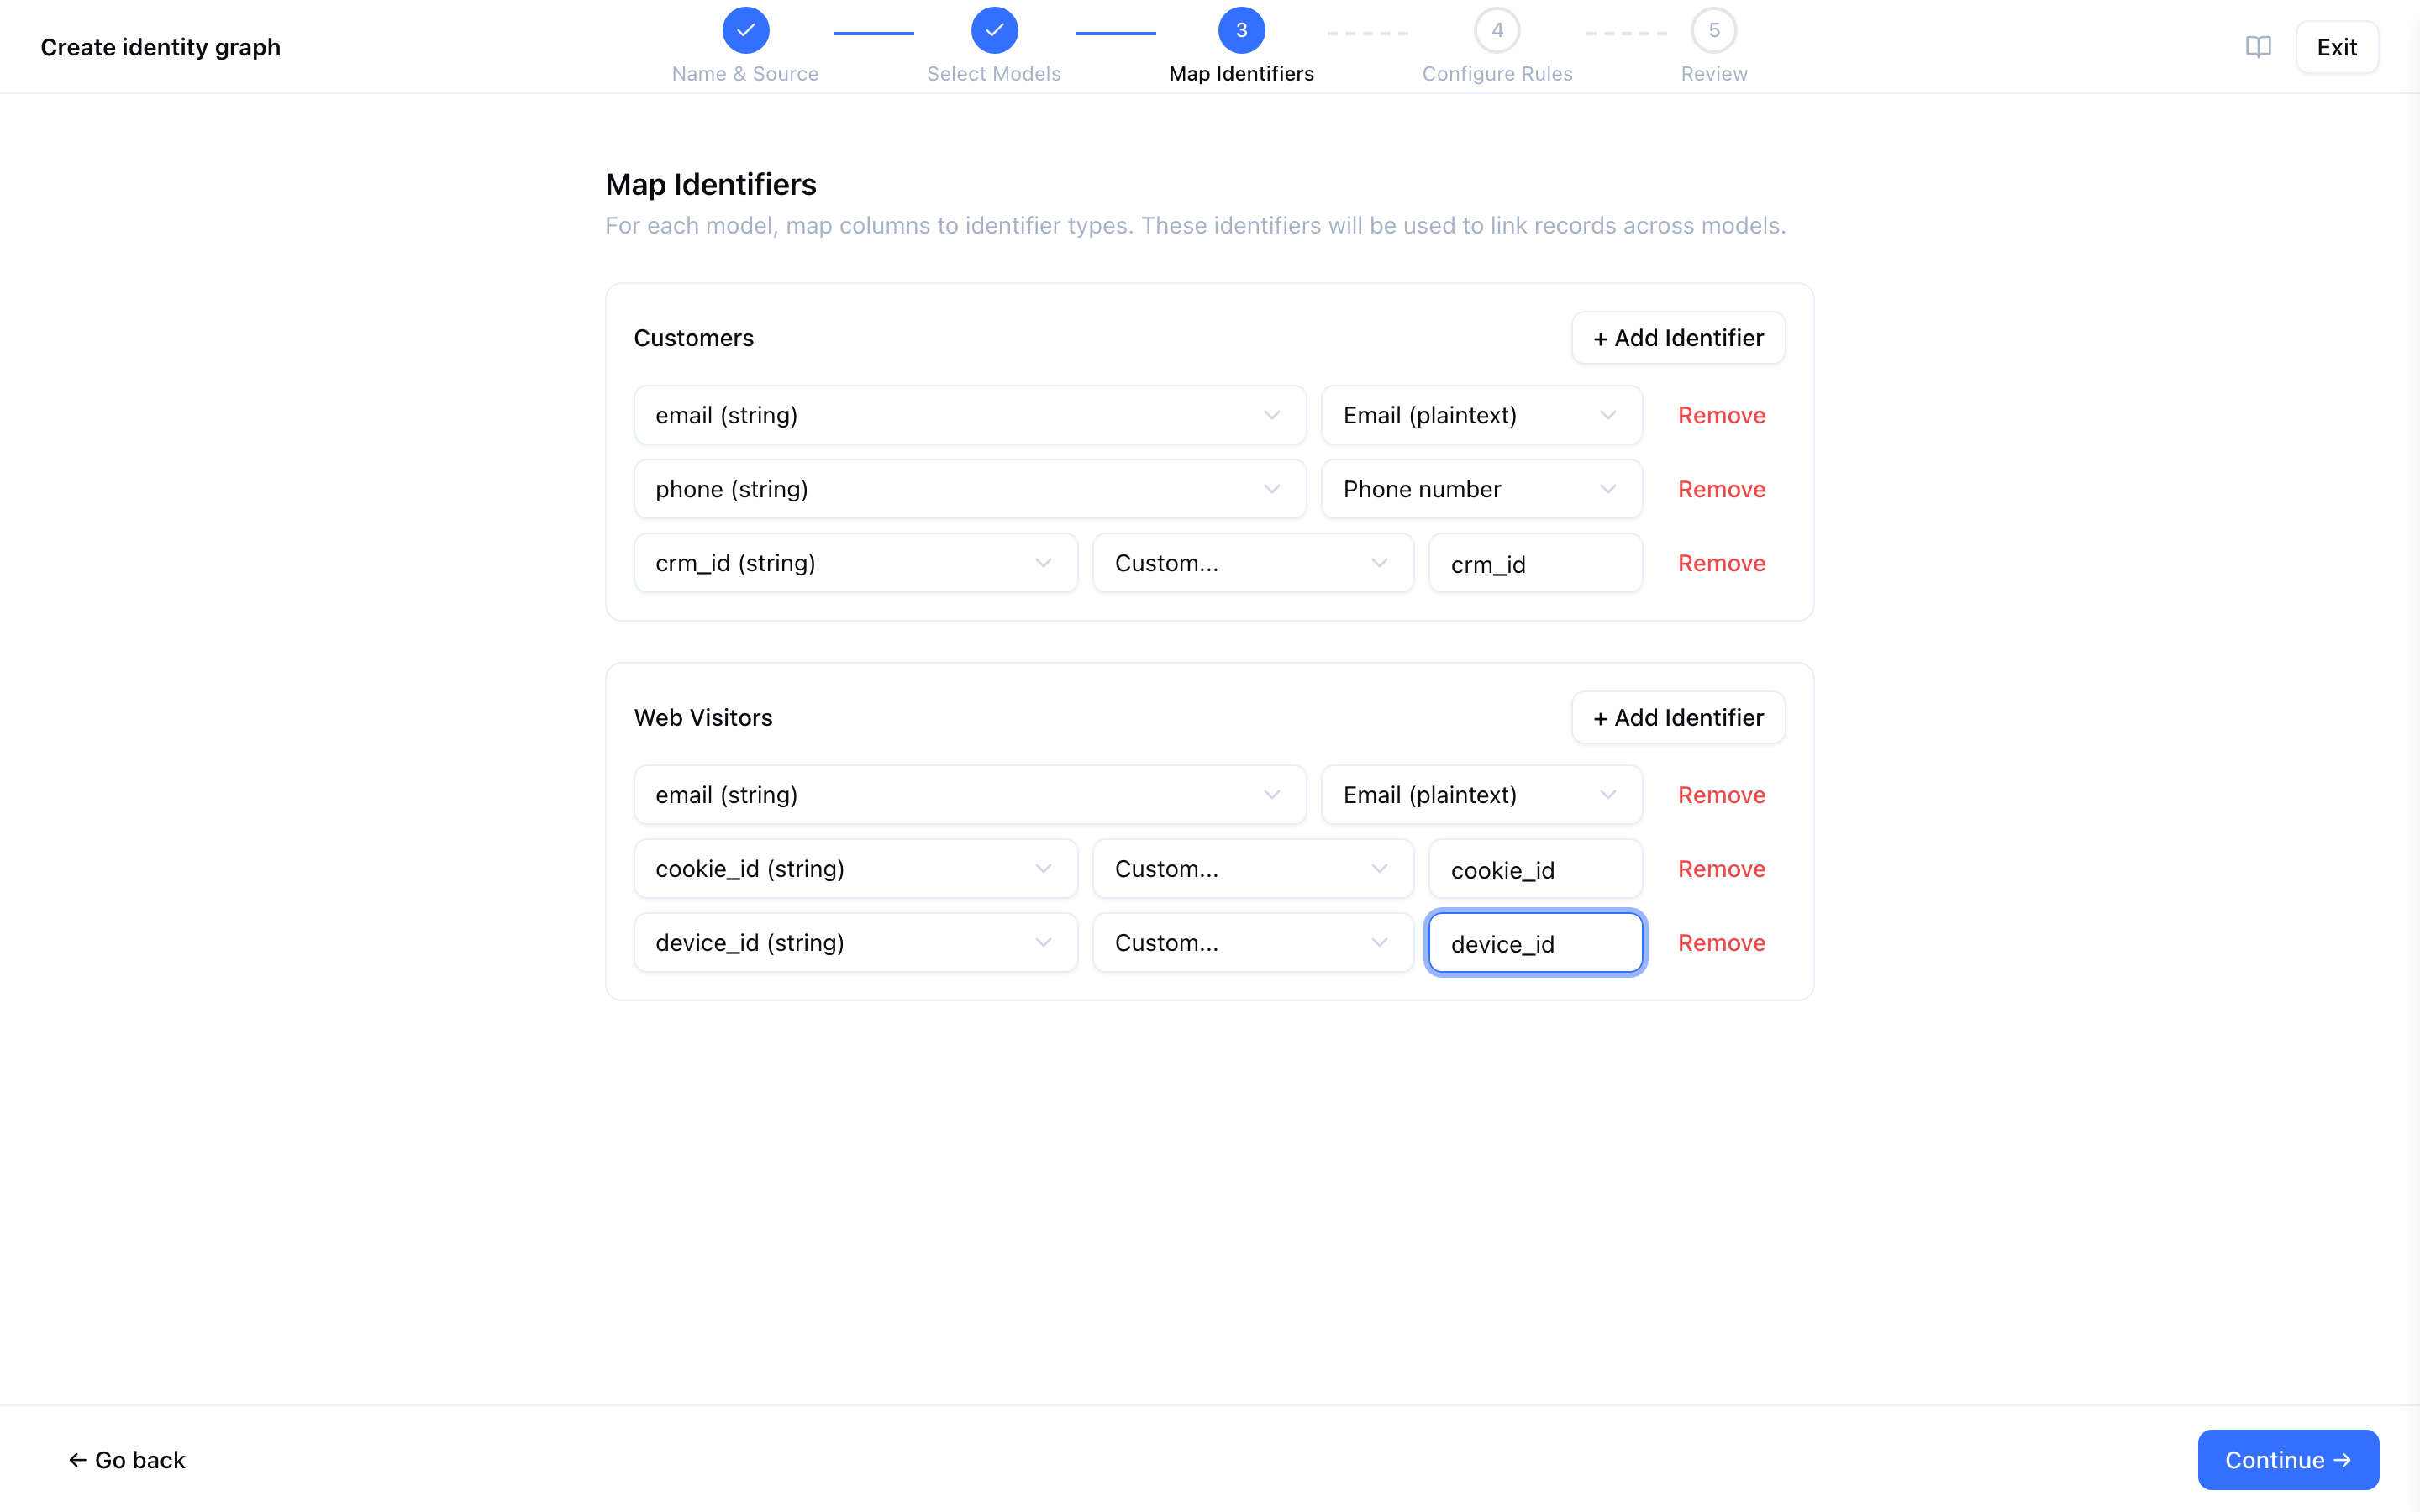
Example
| Model | Column | Identifier type |
|---|---|---|
| Users | email | Email (plaintext) |
| Users | user_id | User ID |
| Users | mobile_phone | Phone number |
| CRM contacts | contact_email_hash | Email (SHA-256 hashed) |
| CRM contacts | contact_id | Custom — crm_id |
| Web events | anonymous_id | Anonymous ID |
Not every model needs every identifier. Two different id systems — a CRM id and an app user id — must be mapped as two different families, never both as user_id: a person is expected to hold one value per family.
Map one column per family per model. If a model maps a second column to the same family, only the first is used in resolution. Split the second one into its own family or its own model.
Normalisation is fixed per identifier type — emails are trimmed, lowercased and hashed; phones reduced to digits; ids trimmed and lowercased. There are no case-sensitivity, normalisation or minimum-length settings; do that shaping in the model’s SQL. See Identifier Families.
Step 4: Configure Rules
This step carries four sections: Merge Rules, Limit Rules, Shared identifier attribution, and an optional Golden Record.
Merge Rules
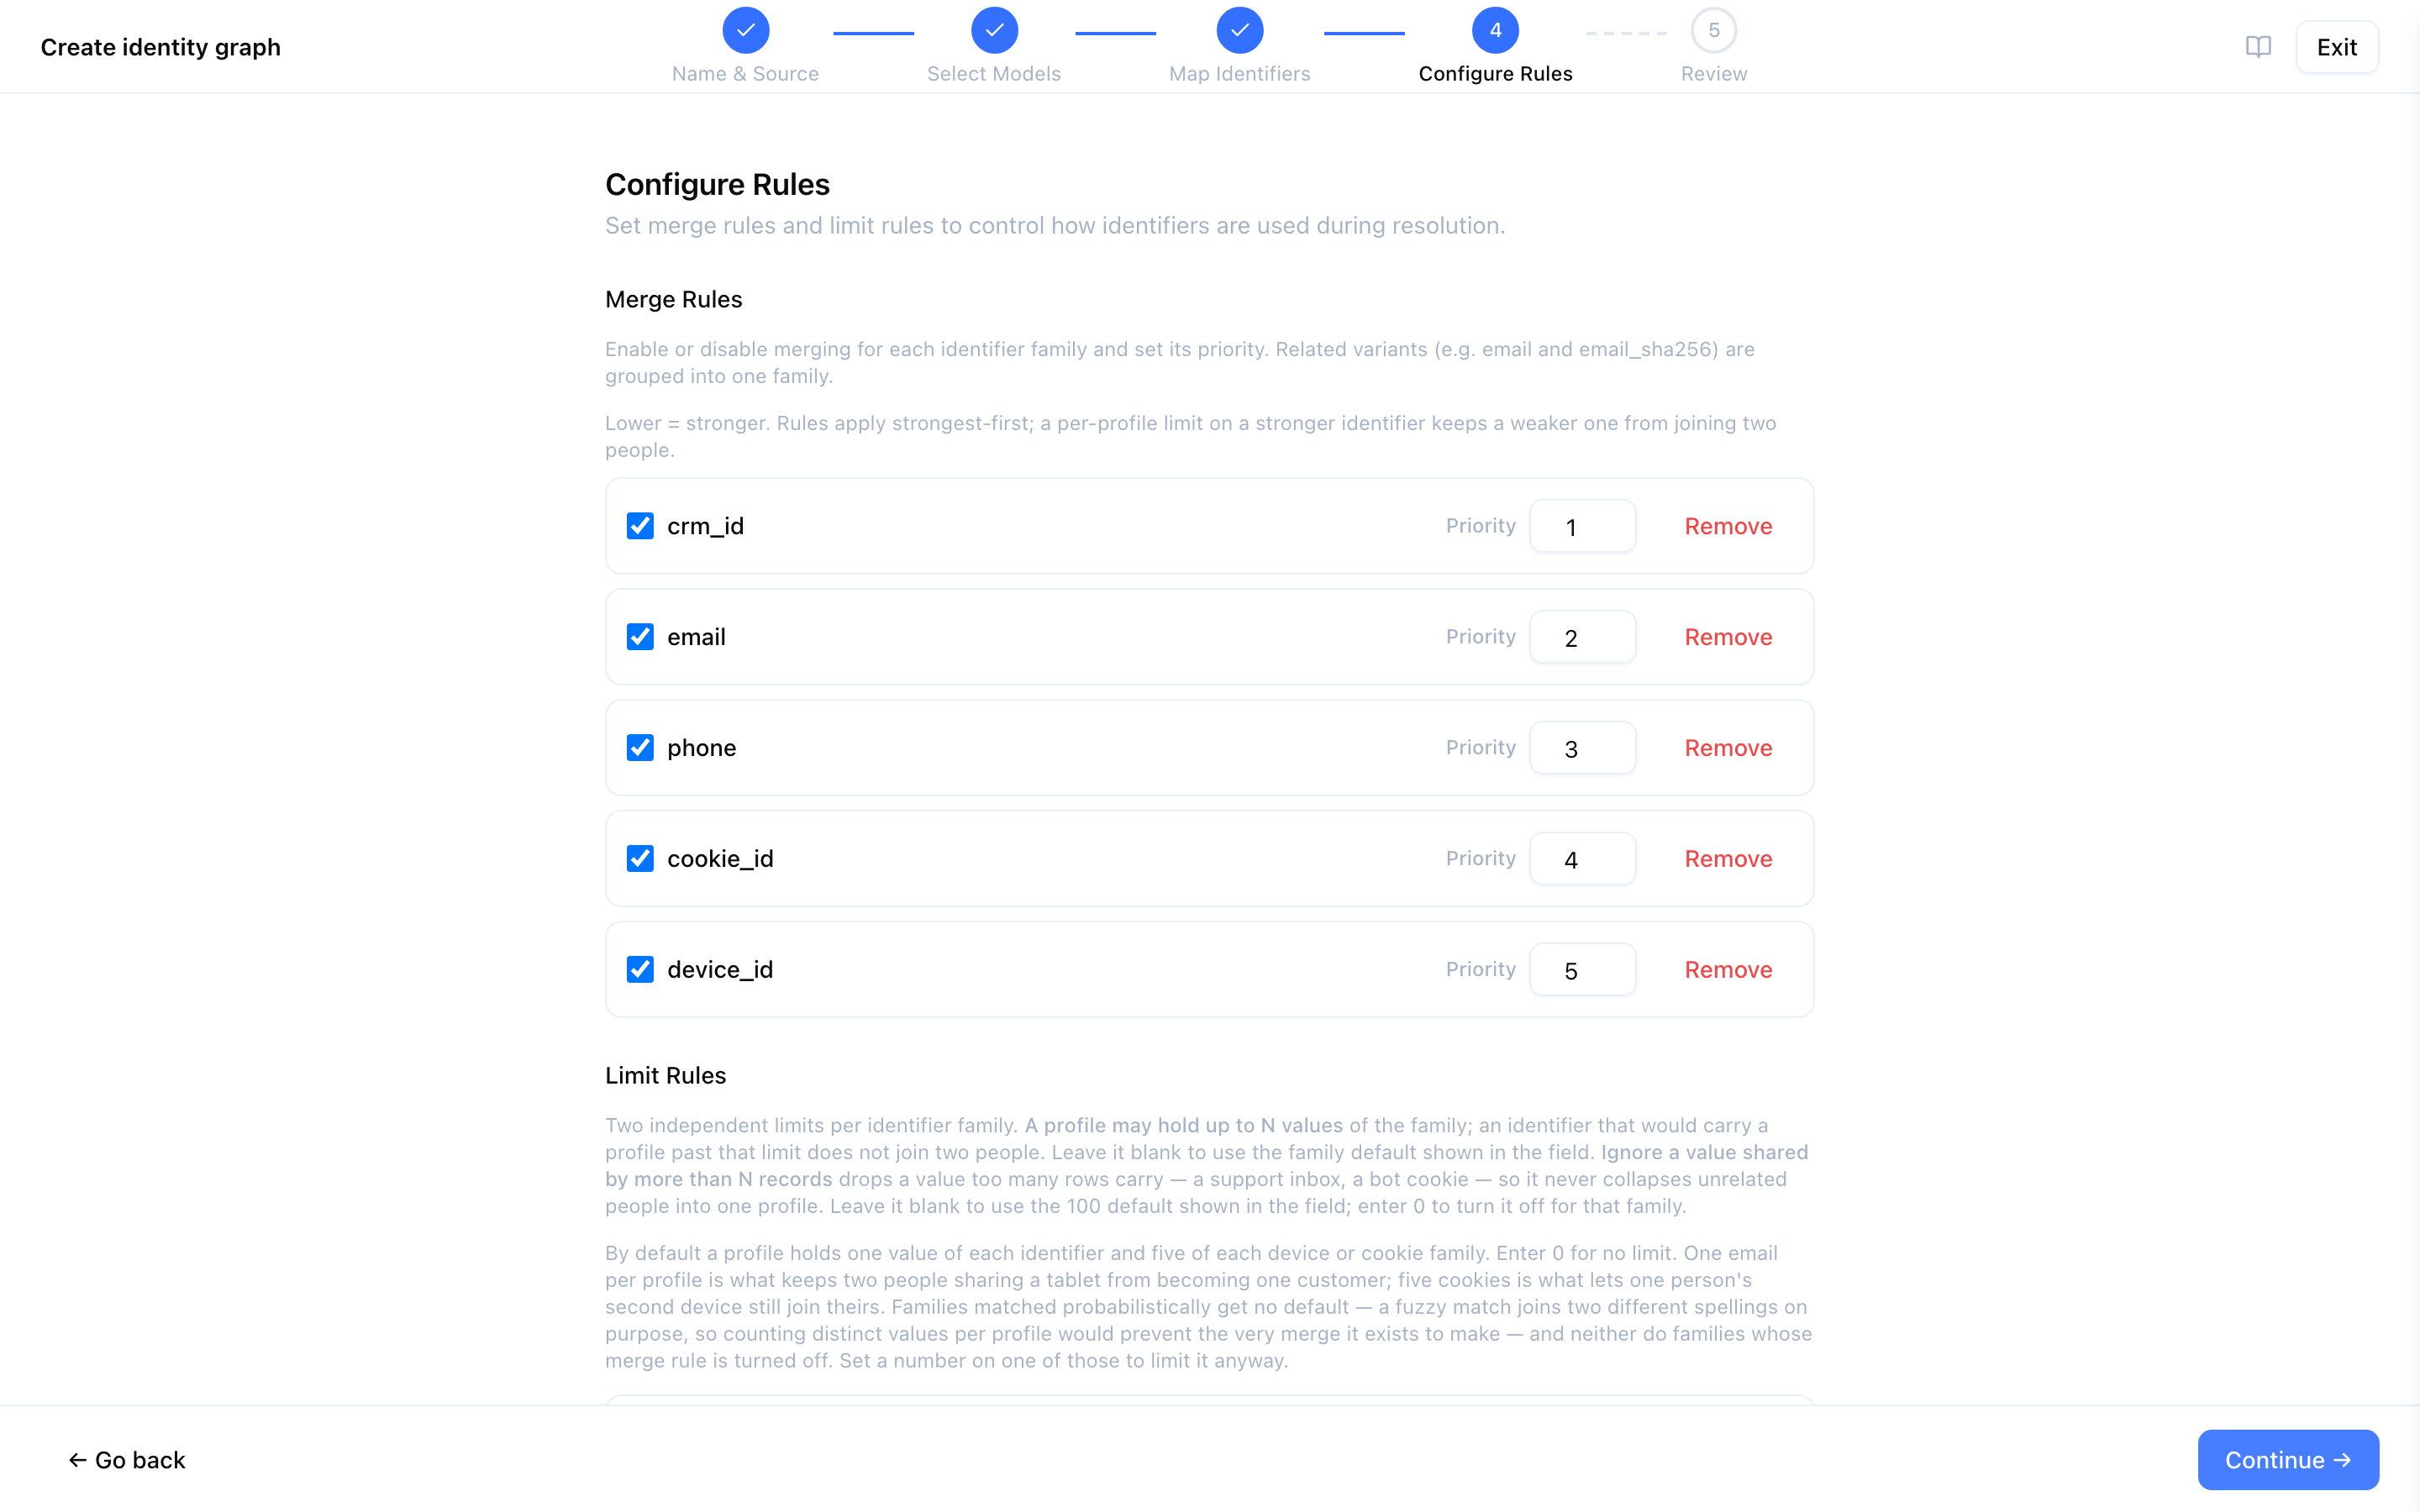
Merge rules decide which identifier matches actually link two records. The wizard seeds one rule per family you mapped, enabled, ordered strongest first.
Each rule row carries:
- a checkbox naming the family — untick it to keep the identifier out of matching entirely;
- Match — Deterministic or Probabilistic. Shown only on a probabilistic graph;
- Priority — a whole number, lower = stronger;
- Remove — drops the rule. A mapped family with no rule is listed underneath as mapped without a merge rule — these identifiers are loaded but never matched, with a + family button to add it back.
A rule matches on the family, so every variant you mapped into it participates — a hashed email in one system links to a plaintext one in another. A rule cannot be narrowed to one variant and cannot require two families at once.
Priority
The wizard seeds priorities by identifier strength, not by the order you happened to map the columns:
| Seeded order | Families |
|---|---|
| Strongest | user_id and custom families whose name ends in id |
email | |
phone | |
| Everything else | |
| Weakest | anonymous_id, cookie, device, IP and advertising-id families |
Adjust them where your data disagrees — you know which of your ids is actually trustworthy — but review the order before moving on. Because every family has a per-profile limit by default, this order decides which merges the resolver is allowed to make at all. See Rule Priority for the semantics and a worked example.
Limit Rules
Each family gets two independent inputs, guarding against opposite failures:
| Input | What it counts | Prevents |
|---|---|---|
| A profile may hold up to N values | Distinct values of the family one profile may hold | Two people sharing a tablet becoming one person |
| Ignore a value shared by more than N records | Distinct records that may carry one identifier value before it is ignored | A placeholder email or bot cookie fusing thousands of unrelated people |
These are not the same number. “One email per person” is a profile may hold up to 1 value. Setting ignore a value shared by more than 1 record does the opposite — matching needs a value on at least two records, so a 1 there switches that family’s matching off entirely.
A profile may hold up to N values is left blank by the wizard, and blank means use the family default, shown as the field’s placeholder:
| Family class | Default | Why |
|---|---|---|
Identity-bearing — email, phone, user_id, a CRM or loyalty id, any other custom family | 1 | One person, one email address. This is the shared-identifier guard |
| Device-class — cookies, device ids, sessions, IP addresses, advertising ids, browser ids | 5 | Phone, laptop, work laptop, tablet — a second device must still pull its anonymous browsing in |
| A family whose merge rule is probabilistic or disabled | none — the placeholder reads none | A similarity match joins two different values on purpose, so counting distinct values per profile would refuse the very merges the rule exists to make |
Type a number to override the default, or 0 for no limit at all — the field then reads values — no limit.
Ignore a value shared by more than N records starts blank, with the default of 100 shown as the field’s placeholder. Enter a number to tighten it, or 0 to turn the cap off for that family — the same reading the graph’s Limit Rules table uses after creation.
| Family | A reasonable value | Rationale |
|---|---|---|
email | 25 | Household and shared-inbox addresses are the usual offenders |
phone | 10 | Support and store numbers appear on many records |
cookie_id | (default) | Shared and reset devices inflate counts legitimately |
user_id | (default) | Should be near-unique; 100 is already generous |
A value shared by more records than this contributes no links. The records carrying it still resolve; they simply are not linked by that value, and can still merge through any other identifier they share.
Two consequences of accepting the per-profile defaults:
- They make priority load-bearing. A merge proposed by a weaker identifier that would give a profile two emails is not made — the two people are kept apart. Check your priority order.
- They make incremental updates do more work. A graph with a per-profile limit resolves everything reachable from what changed, not only what changed, and rebuilds from scratch when that reaches more than half the graph.
Because every deterministic, enabled family is defaulted, every graph you create is a limited graph unless you set its families to 0. Graphs created before per-profile limits were defaulted are unaffected — their families were written with no limit explicitly, so nothing about them changed.
See Limit Rules for worked examples of both settings.
Shared identifier attribution
Below the limit rules is one three-way choice. The prompt reads When an identifier is shared by two people, give its anonymous activity to:
| Option | Effect |
|---|---|
| the person seen with it first (default) | Whichever person the shared identifier was seen with first keeps its anonymous activity |
| the person seen with it last | Whichever person it was seen with most recently keeps it — the better guess for a device that has changed hands |
| no one | The anonymous activity stays on its own, as its own profile |
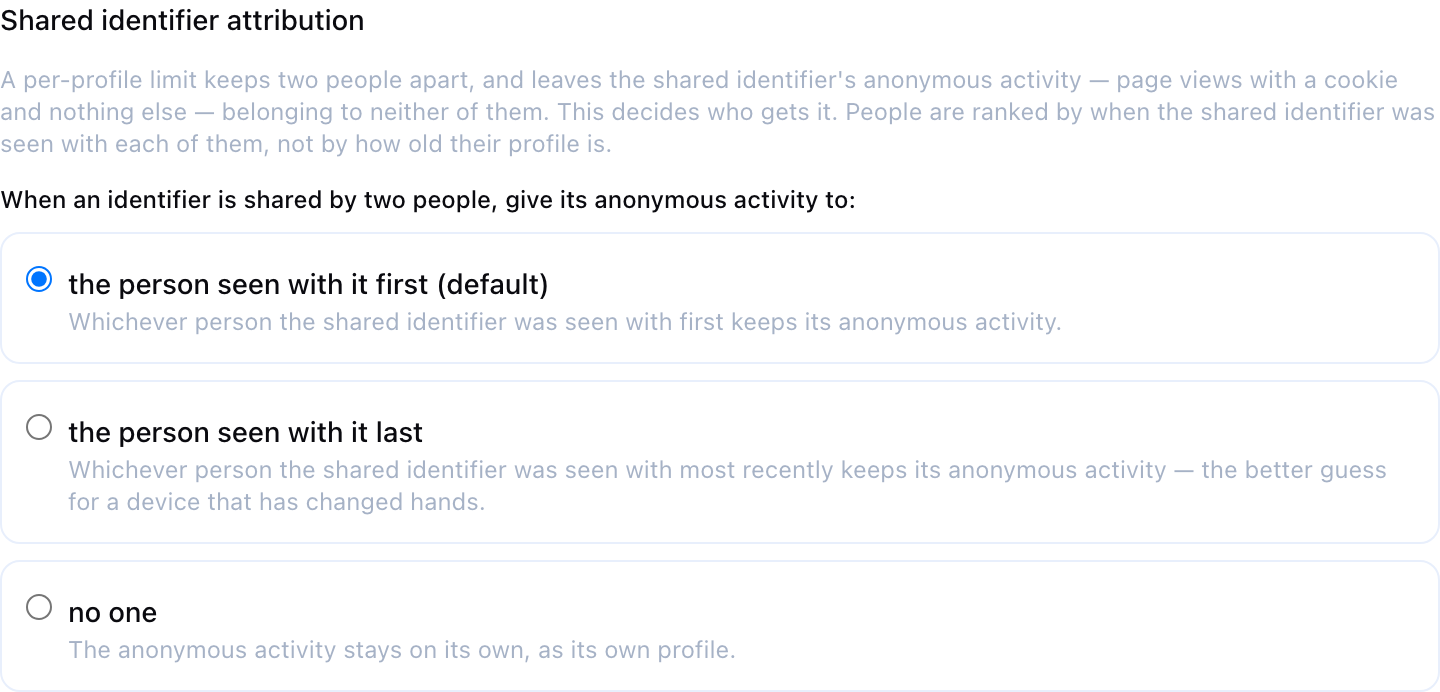
People are ranked by when the shared identifier was seen with each of them, not by how old their profile is. The setting answers one narrow question — who gets the identifier-less records on a shared device — and it never merges the two identified people, under any setting.
The control does nothing until some family limits how many values one profile may hold. Since every deterministic family is defaulted, that is true from the start unless you have set them all to 0; the wizard says so beside the control rather than disabling it.
Leave it on the person seen with it first unless you have a reason not to. Choose no one where anonymous activity must never be credited to a named individual. Changing it later makes the next run rebuild from scratch.
See Shared identifier attribution for the worked example.
Golden Record
Optionally configure a golden record here — the unified attributes each profile should expose, and the survivorship strategy for each. This section is optional and can be configured later from the graph’s Golden Records tab.
Step 5: Review & Schedule
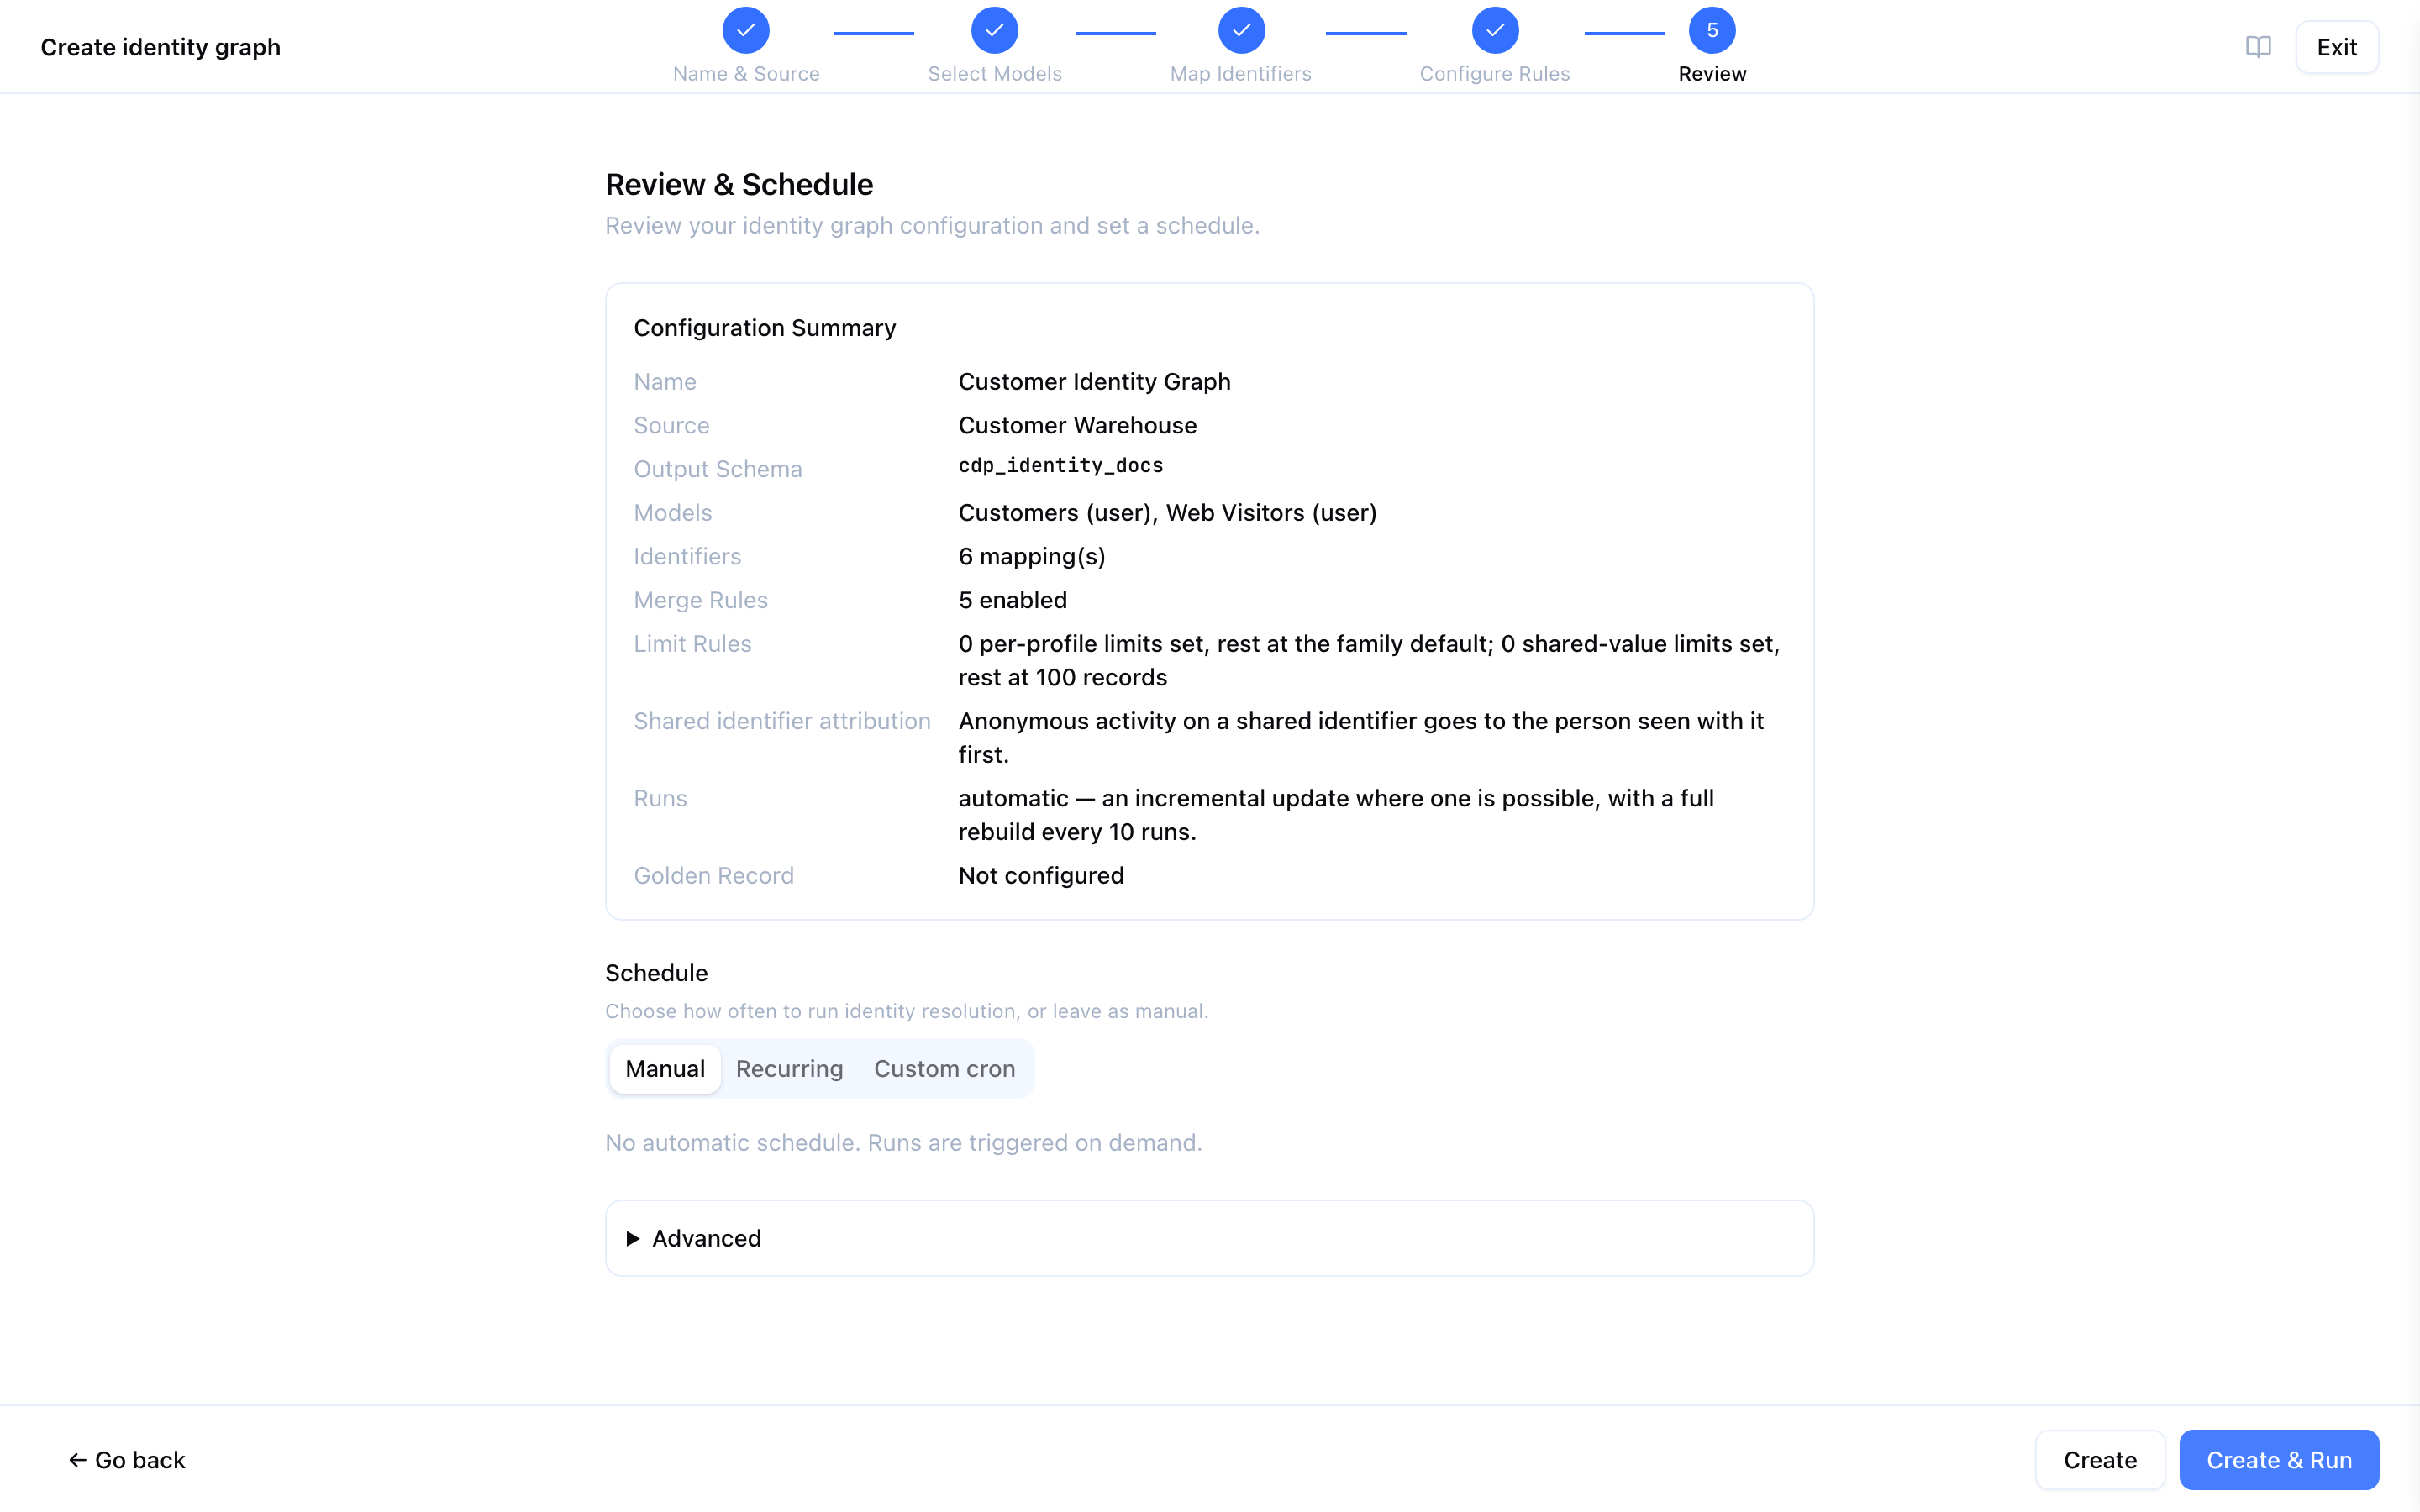
Configuration summary
The review step restates the whole configuration:
| Row | What it shows |
|---|---|
| Name, Source, Output Schema | As entered in step 1 |
| Models | Each model with its type |
| Identifiers | How many column mappings |
| Merge Rules | How many are enabled |
| Limit Rules | How many per-profile limits you set against how many are inherited, how many shared-value limits you set against the 100-record default, and how many families you explicitly left unlimited |
| Shared identifier attribution | Stated as a sentence, e.g. Anonymous activity on a shared identifier goes to the person seen with it first. |
| Runs | Stated as a sentence, e.g. automatic — an incremental update where one is possible, with a full rebuild every 10 runs. |
| Golden Record | The number of attributes, or Not configured |
Schedule
Choose how often resolution runs, or leave it manual to run the graph on demand only.
Advanced: run mode
How each run resolves is the system’s decision, not a per-run choice you make. A graph runs automatically by default: every run decides for itself whether an incremental update is possible, rebuilds from scratch when it is not, and records which it did and why.
Under Advanced you can change that, and rarely need to:
| Setting | Meaning |
|---|---|
| Run mode | Automatic (default) — decides per run whether an incremental update is possible and falls back to a full rebuild when it is not. Set Full to rebuild every time |
| Full rebuild every N runs | Shown on Automatic only. Rebuild from scratch after this many incremental runs, so a graph cannot drift indefinitely from a clean rebuild. Default 10, minimum 1 |
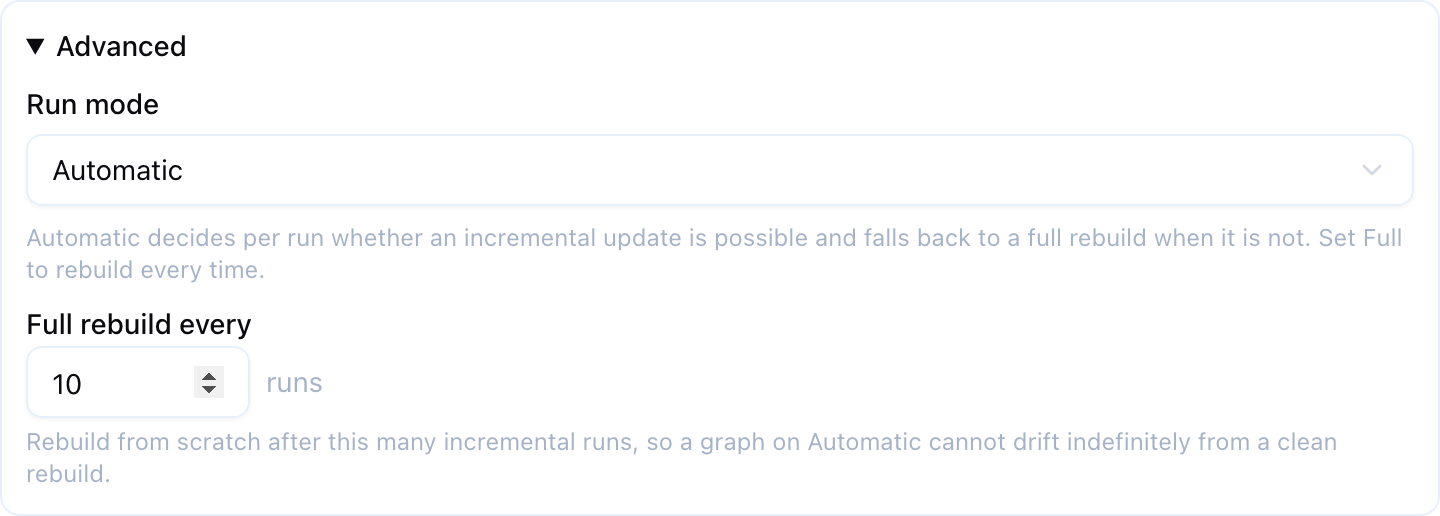
Both are saved with the graph by the create call itself, so the configuration you review here is the configuration the graph is created with. Neither control appears on the graph’s Configuration tab afterwards — changing them on an existing graph is done through the identity graph API.
Expect to see full rebuilds in the run history of an Automatic graph. Several conditions require one — a rules change, a first run, a missing change-detection cursor, no timestamp column anywhere, a change that reaches most of the graph, a probabilistic graph — and every run records which it actually did and why; see What actually ran.
Validation
The configuration is checked as you go, and again when you create:
| Check | Where |
|---|---|
| Name is present and not already used in the workspace | Step 1, inline; Continue is disabled |
| A source is selected | Step 1; Continue is disabled |
| At least one model is selected | Step 2; Continue is disabled |
| Every model has a primary key column | Step 2; unusable models cannot be ticked |
| Full rebuild every is a whole number of 1 or more | Step 5, before anything is created |
| One merge rule per family, and no probabilistic rule on a deterministic graph | On save |
| One limit rule per family, and no negative limit | On save |
| The default confidence threshold is between 0.0 and 1.0 | On save |
Mapped columns are not checked for existence or type at creation time — a mapping that names a column the model does not expose surfaces when the graph runs.
Create
Two buttons finish the wizard:
- Create — saves the configuration. It does not run resolution.
- Create & Run — saves the configuration and immediately triggers the first run.
After Creation
From the graph’s detail page you can:
- Run it — Run now starts a run and lets the pipeline choose incremental or full; Rebuild from scratch, in the overflow menu, forces a full rebuild. See Running Resolution
- Edit the configuration — the Configuration tab holds name, description, output schema, schedule, shared identifier attribution, the default confidence threshold on a probabilistic graph, the models and their user/event type, identifier mappings, merge rules and limit rules, each with its own save button. It also shows the effective limits per family, marking which came from a default
- Review runs — the Runs tab shows what each run did and why, with profiles, merges and rows read
- Configure golden records — on the Golden Records tab
- Look profiles up — on the Explorer tab
- Set alerts — on the Alerts tab
Identity resolution configuration is iterative. Start with conservative merge rules and tight limits, run, review the results in Profiles, then loosen as you gain confidence in the matching quality.
Next Steps
- Identifier Families — What each identifier type means and how it is compared
- Merge Rules — Design effective merge rules and priorities
- Limit Rules — Prevent over-merging
- Running Resolution — Execute identity resolution