Workspace Setup
A workspace is the top-level container in Zeotap that holds all your sources, models, destinations, audiences, and configuration. This guide walks you through creating and configuring a workspace.
Creating a Workspace
Every workspace belongs to an organization, and only the organization’s administrators can create workspaces in it.
If you are new and nobody has invited you:
- Sign up at your Zeotap instance URL and request access, giving your name on the form
- When your access is approved, an organization is created for you, named after you (for example, Jane Doe’s Org), and you are its administrator
- You are taken to Create a new workspace (the approval email links there too). Enter a name and click Create workspace. The workspace opens
You can rename the organization later under Organization settings, opened from the user menu.
If you had already been invited to an organization, no organization is created for you. Accept the invitation instead, from Invitations in the workspace switcher or from the invitation email.
If no organization was created for you on approval, you are taken to Set up your organization instead. Enter an Organization name and a First workspace name, then click Create organization: the organization is created with you as its administrator, and its first workspace opens. Any pending invitations are listed above the form under You have been invited, so you can join the team that invited you instead.
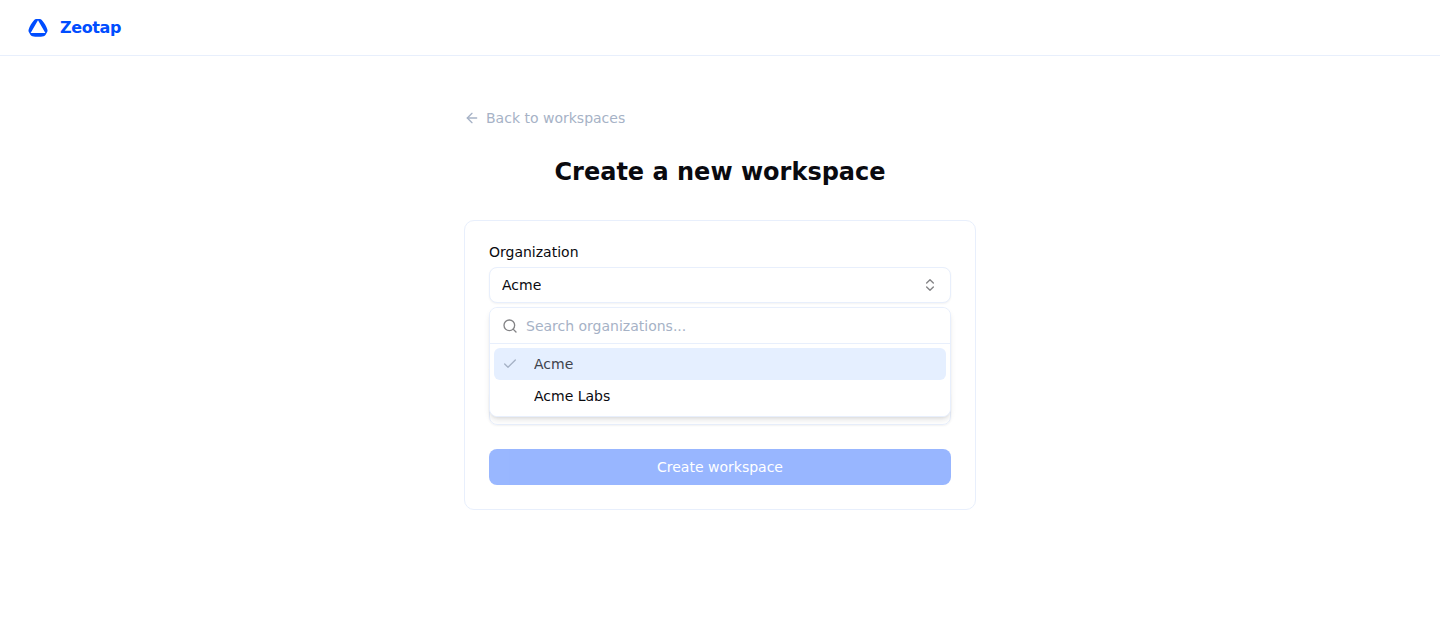
If you are already an organization administrator, create more workspaces from Select a workspace → Create a workspace, from Create workspace on an organization’s row in Your organizations, or from Organization settings → Workspaces. Pick the organization the workspace belongs to — the Organization picker is searchable and lists only the organizations you administer — and give it a name.
If you are a member but not an administrator, you cannot create workspaces, and the create page says Only organization admins can create workspaces. Ask one of your organization’s administrators to create one, or to add you to a group that reaches an existing workspace.
No warehouse is chosen here. A workspace can hold several, and you connect the first one after it exists.
Giving Your Team Access
People are not added to a workspace one at a time. Access is granted to a group, which lives on your organization and is granted a role on each workspace it should reach. Somebody gets into a workspace by being in such a group, and nothing else.
- Invite the person to the organization: in Organization settings → Members, fill in Invite a new member with their email and the groups they land in, then click Invite
- Create the group that should reach this workspace, under Organization settings → Groups
- In that group, add the workspace and pick the role or roles it should carry there
- Add people to the group
The built-in roles are:
- Owner — Full access, including deleting the workspace
- Admin — Full access to everything except deleting the workspace
- Member — Read across the platform; creating and changing things belongs to Owner and Admin
A group may hold several roles on one workspace, in which case its members get the union of what those roles allow. For finer control, define a custom role under Organization settings → Roles and list the permissions it should carry — see RBAC.
Inside a workspace, Workspace settings — the last item under Governance in the sidebar — has two tabs for this:
- Members lists everyone who can reach the workspace and the group and role that let them. It is read-only: access changes through groups.
- Groups lists the groups that reach this workspace. Organization administrators can change each group’s roles here, Revoke its access, or give another group access; anyone holding the access-policy permissions can assign the group’s access policies in this workspace. Organization-wide grants (marked every workspace) are changed from the group itself, under Organization settings → Groups.
Workspace Settings
General
Workspace settings → General holds the workspace-wide choices:
| Setting | What it controls |
|---|---|
| Workspace name | The display name in the workspace switcher |
| Schedule timezone | The timezone every cron schedule in the workspace is read in — syncs, loaders, journeys and feeds — with daylight saving followed |
| Audience evaluation timezone | What “today”, “this month” and a picked date mean in audience filters. Every calendar boundary is computed in this zone. |
| Week starts on | The first day of a calendar week for week-granularity audience filters |
| Event delivery log warehouse | Which warehouse the event delivery log is written to, as audit_logs.event_delivery_log |
| Zeotap Agent | Whether members can chat with the agent to build audiences, journeys and computed attributes |
| Mask personal data in stored conversations | Replaces emails, phone numbers, card numbers and IP addresses with a type marker before a conversation is stored |
| Review changes in the background | Whether Zeotap Agent reviews a saved audience, journey or sync for mistakes and reports what it finds. Needs Zeotap Agent to be on — see Background Review |
| Workspace context | Background the agent should keep in mind — business context, naming conventions, priorities. Included in its prompt on every turn. |
The two timezones are deliberately separate. One decides when a schedule fires; the other decides what a date means inside a filter, and a workspace reporting in one zone while operating in another needs both.
Owners — anyone holding workspace.delete, which includes members of Organization admins — also see a Danger zone at the bottom of the tab, with Delete workspace. Deleting a workspace permanently removes it and its data, and cannot be undone.
API Keys
API keys live under API Keys in the sidebar rather than in Settings. See API Keys for the key classes and what each one can reach.
Organizations
Your workspaces live under your organization, which is where members, groups and roles are managed centrally. See Organizations.
Next Steps
- Connect your first source
- Set up RBAC for fine-grained access control
- Configure destination policies for compliance